

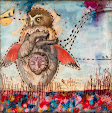
Above:
Palette of encaustic paint colours on the griddle
Thank you to all those that emailed or messaged me with regards to what you would like to see on the blog, re: future posts..Most folks said they would like some of the following:
- How to techniques
- How to access your inner creative soul - new programming being developed for you in this area…keep posted
- When to decide to stop, when is a piece finished
- Changing up the process
- Colour palette choices
- And more
So to start with I thought I would share "How to do an image transfer on encaustic medium work"
Below is a series of photos to walk you through the steps I take in completing the image transfer on encaustic work.
Step1: Materials you will need
- Your encaustic painting
- Metal spoon (for burnishing)
- Spray bottle of water
- Laser, or toner based photocopies on lightweight non glossy paper
- Propane torch, heat gun or heat lamp
- Clear encaustic medium and encaustic brush

Above: Step 1 - Setting up for doing an image transfer

Above: Step 2 - Heating the area where the image transfer will be set
Step 2: Prepare the area where you would like to place your image transfer by applying some heat to the area with the propane torch or heat gun. The area needs to be warm to touch (not molten liquid) and recently fused with heat within 10 minutes to create the ideal setting for the image transfer.
Above: Step 3 - Prepping your image transfer
By stripping away any excess white paper, leaving some paper outside of the image
Above: Step 4 - Place image transfer in the area you would like it to appear
Step 4 : Lay the transfer in the area you would like to see it. Using a clean spoon, burnish the copy in a circular motion for about three minutes. A good burnish into the wax is important. You can never burnish too much, or too long. Make sure no wax gets transferred to the back of the paper. Also it is important that the encaustic medium is not too soft, if it is, the pressure from burnishing will produce indentations. So the surface has to be warm to touch but not soft.

Above: Step 5 - Spray the image transfer area with plain cold water.
Step 5: Spray the top of the burnished image with water to soak the paper. With the tips of your fingertips (without the use of your fingernails, avoiding sharp piercing edges) roll off the soaked paper from the surface. The carbon from the photocopy is left burnished onto your encaustic work.

Above: Step 6 - Pat dry with a lint free cloth
Above: Step 7 - Gently oscilliate the heat from the heat gun over the dried image transfer.
Step 7: The carbon that is released onto the work is sitting on the surface at this point and needs to be gently fused to the previous layer of your work. Using a heat gun, heat the image transfer carbon gently with a circular motion so it fuses to the previous layer. Be careful not to apply too much heat or get too close to your work with the heat gun or your carbon image might shift or possibly break apart. This might end up being a happy accident if this were to happen. So remember to enjoy this process and let go of being attached to the outcome.
Above: Step 8 - Protecting your image transfer with some encaustic medium
Step 8: After the image transfer is on the work, and has had a chance to cool slightly, apply a clear layer of encaustic medium over the image. This will protect your image transfer from being scratched accidentally. If you decide you want to put a colour encaustic medium over it, translucency will be important so that you can still see the image and it will nicely recede to the background vs. being on the surface.

Above: Step 9 - Final round of fusing.
Step 9 - Using a circular motion, apply a second heat application with your heat gun, being careful not to get too close to the image transfer. I find oscillating the heat really helps the image to stay intact. This final fusing step removes any brush marks left from the protective layer of medium you have just applied. It creates a nice smooth finish, if that is what you are aiming for.
Above: Final Step - Image Transfer is complete
Your Transfer process is now complete. You could leave it on the surface or bury it into the background by applying more translucent colours over the image.
If you have enjoyed this post, or have any feedback, I would love to hear from you, please leave me a comment on this blog post. Thank you!
I teach many encaustic workshops throughout the year, and a complete listing of my class schedule can be found here!
This technique has been published in Seth Apter's new book, "The Mixed Media Artist: Art Tips, Tricks, Secrets and Dreams from over 40 Amazing Artists."


Seth has done an amazing job of bringing together 40 wonderful artists who share what they LOVE to do….enjoy the book, worth getting it..Roxanne's Reflections in Fergus, ON. has a few copies if you would like to purchase your own book.


8 comments:
Thank you so much for sharing this on your blog Supria!
Thank you so much Josée for your comment :)
Have fun with it if you try it
Nice clear instructions, thank you Supria. Inspiring.
Thank you Ev for your feedback.
This is on my to do list now. Very nice and clear instructions. Thanks for sharing.
Thanks Paula for your comment..have fun trying it..
Supria
Post a Comment